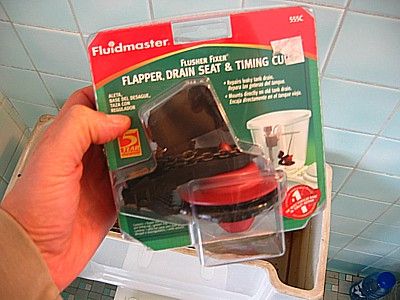
 01.Introduction to the repair of the toilet discharge valve One of the most common and frustrating problems that toilet deposits often present is the slow but persistent loss of water through the toilet flush valve.As the valves are so important parts of a toilet mechanism so try to get the best toilet fill valves or other parts.As the water is filtered, the water level in the tank drops and the float is activated, causing water to continue to enter. It is a problem that causes waste of water and a huge annoyance. Well, one of the most ingenious products I have found is the $ 10 repair kit manufactured by Fluidmaster called Fluidmaster "Flusher Fixer" Model 555C . You can repair the discharge valve with an infallible kit that anyone is able to install. In this practical guide I will show you how easy it is to install it and you can save more than $ 100 from the plumber's visit. 02.Close the water passage 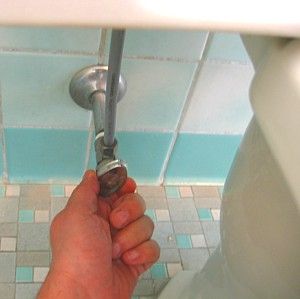 The first step in the repair of the toilet is to close the water passage to the reservoir. In case you do not find the closing key, you should cut the water supply in the meter. 03.Remove the discharge valve or old rubber bulb system. 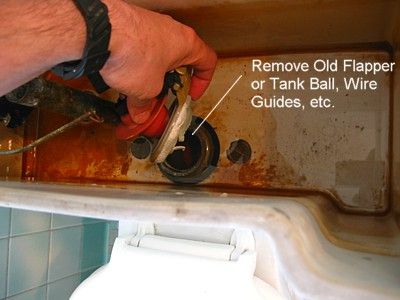 Once you have cut the water supply, press the button to download the deposit. Remove the old rubber bulb with a wire or with the rod. No part of the discharge valve system should remain. The seat or base of the valve where the water drains should be exposed. Take care so that nothing falls into the discharge valve orifice as it may get stuck. 04.Remove excess water from the tank 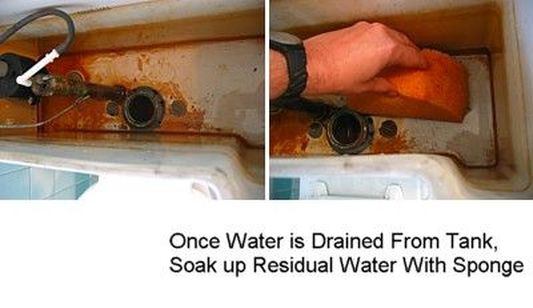 Once you have emptied the reservoir and removed the old rubber bulb, you will see that there is still some water in the bottom of the reservoir between the bottom of the reservoir and the upper part of the discharge valve seat. You must eliminate this water and the simplest way to do it is using a sponge. I discovered that the sponges that are used for wall-papering are the best. But if you do not have one of these at hand, any sponge will be useful. Absorb the water, drain it out in the sink and repeat this until you have removed all the water from the tank. 05.Clean the valve seat 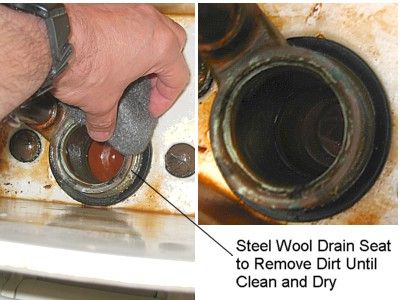 In case the seat of the old valve is made of bronze (most are) it should be cleaned. The simplest way to do this is to use steel wool or fine sandpaper to remove all types of debris or sediment. Then rinse with a soft cloth and dry well with a towel or hair dryer. If you use the hair dryer, make sure not to expose the heat to the same place for too long. 06.Install the sealing ring on the drain valve seat  The most ingenious of this modern Fluidmaster system is the sealing ring that it offers. You open it and stick it! Well, maybe not so much, but almost as simple as that. You should only peel the paper from one side and carefully center it over the previously cleaned valve seat. You must press gently to fix it in the correct position. Do not press too hard! 07.Detail of the Jebe pear system  In this image you can see the grooves under the seat of the ball valve that will rest on the sealing material. This will create a very resistant hermetic seal. 08.Place the Jebe pear valve assembly 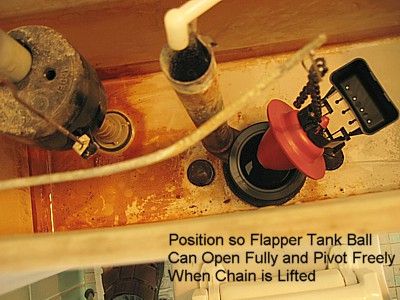 Before removing the paper from the sealing ring, try to fit it and stay as well as possible in the rubber bulb valve system.
09.Hook the chain that opens the valve 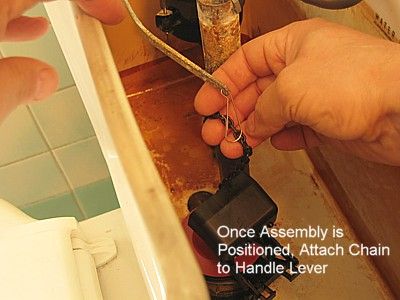 With the new valve system firmly seated in place, the next step is to hook the chain that makes the valve open:
10.Open the water passage and fill the tank  All that remains to be done is to reopen the water passage, let the tank fill and verify the operation of the discharge.
You have finished! This problem will not cause you more discomfort for a while and you have just saved more than $ 100 in the repair. Source: aboutespanol.com
0 Comments
Leave a Reply. |
